What is PuTTY
PuTTY was developed by Simon Tatham and is a very common light-weight MIT-Licensed free and open source Secure Shell (SSH) client for connecting to Linux/Unix systems via a Teletype (TTY) terminal emulation mode console. Currently there are ports for Microsoft Windows, other unix like systems, and ports in progress for Mac OSX and Symbian mobile phone OS.
PuTTY fits into that class of tools we affectionately call Swiss Army Knives because it is Light, Multi-Purpose, and Good Enough. As an added benefit it is free and open source with a generous license so it is commonly embedded in commercial apps.
PuTTY comes in handy both as an SSH terminal console and as a SSH Tunneling tool which allows you for example to use PgAdmin III from a local windows workstation against a remote PostgreSQL server even in cases where the linux/unix PostgreSQL pg_hba.conf and postgresql.conf file only allow local connections or non-SSH traffic is blocked by firewall. For more about the nuances of configuring the pg_hba.conf PostgreSQL server file that controls user access check out Hubert Lubaczewski's “FATAL: Ident authentication failed”, or how cool ideas get bad usage schemas http://www.depesz.com/index.php/2007/10/04/ident/
In this article we shall cover how to use PuTTY's SSH Tunneling feature to access a remote PostgreSQL server that doesn't allow remote connections. To make it a little more interesting we shall demonstrate how to do this for PgAdmin III.
SSH Tunneling and why you might need it
First off we'd like to say the command-line tool psql that also comes with PostgreSQL is nice and has its charm. It is simple enough that it can be run from an SSH console without tunneling so not much need for SSH Tunneling here. Unfortunately psql is scary to beginning PostgreSQL users, and also requires you have a fair number of SQL commands memorized to make the most use of it. PSQL also requires some typing which is annoying for many general use cases. It is ideal for scripting things and so forth, but it just is not a GUI app and was not designed to be.
This is where the PgAdmin III tool fits the bill. PgAdmin III comes packaged with PostgreSQL but can also be installed separately. Now how do you use PgAdmin III when all you have is shell access to your server box and all the PostgreSQL ports are blocked or pg_hba.conf is configured to not allow remote access? This is where SSH Tunneling comes in handy.
What SSH Tunneling allows you to do is to tunnel all your traffic to the server thru your SSH connection. It is basically a Virtual Private Network (VPN) using SSH. The basic idea is you map local ports on your pc to remote service ports on the server. When you launch your SSH session, you can then connect with any application e.g. PgAdmin III, MS Access whatever to this remote port via the local port. Instead of specifying the remote server port when setting up your PgAdmin III or MS Access connection, you specify the ip as localhost and port as whatever port you configured to receive traffic via the Tunnel.
Setting up SSH Tunneling with PuTTY
If you do not have PuTTY already, you can download it from http://www.chiark.greenend.org.uk/~sgtatham/putty/download.html. Windows users can download the respective putty.exe. Putty is fairly small and can even fit on a floppy. It is really sweet because it requires no installation - just click and run.
Once downloaded, simply launch the putty.exe.
Once launched, your screen will look something like this.
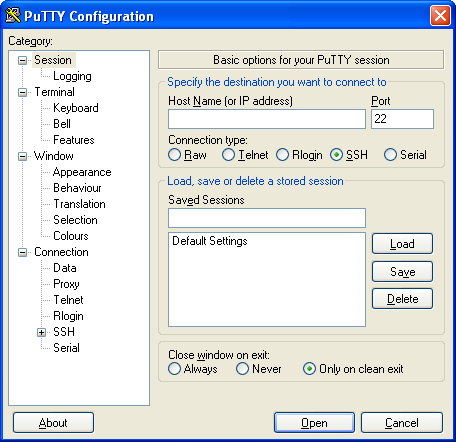
Now create a connection by following these steps:
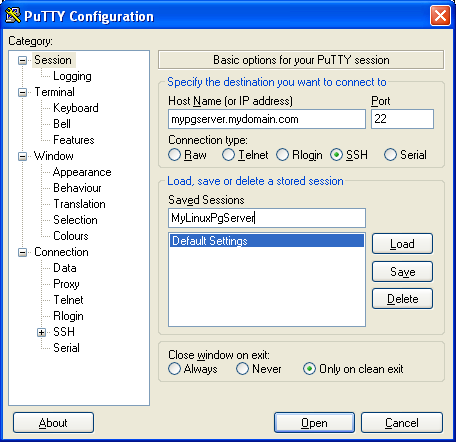
- Fill in a hostname or ip address of your PostgreSQL Server in the field labeled (Hostname or IP Address)
- Fill in The name you'd like to reference this connection in the Saved Sessions field. At this point your screen should look something like this
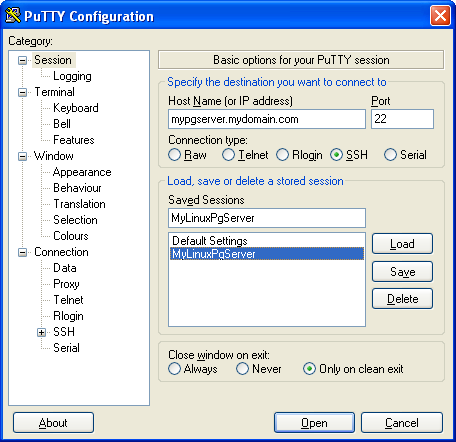
- Click the Save button, and select the new session - your screen should look like this:
Now set the tunneling configuration
- To set the tunneling configuration of this new session or an existing session, simply select session
- Click Load
- Expand the Connections->SSH->Tunnels: Your screen should now look like this
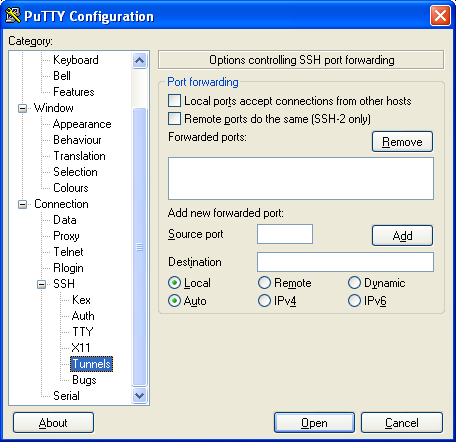
- Next click the Local radio box and type in the Source Port - this is the server's postgresql port which is generally 5432
In Destination - this is the server address and port you want the traffic redirected to on server. For personal desktop use, we tend to use L5432 (if you are not running a postgresql dev server locally) or Lsomeotherunusedport (e.g. L8888) if you already have 5432 in use. So to have pgserver port 5432 traffic (when pgserver is listening on localhost) and you want traffic forwarded to your local 8888 port - your Forwarded ports section should look like this
L5433 localhost:5432Note: You could very well put the LAN ip address of your workstation in here such as 192.168.1.2 if you want local users to share your Tunnel connection.
At this point your screen should look something like this
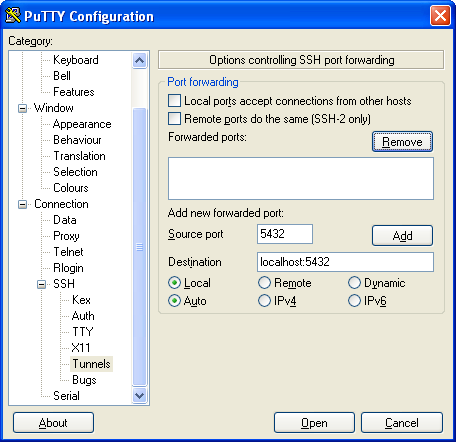
- Now click the Add button. Which should make your screen look like this
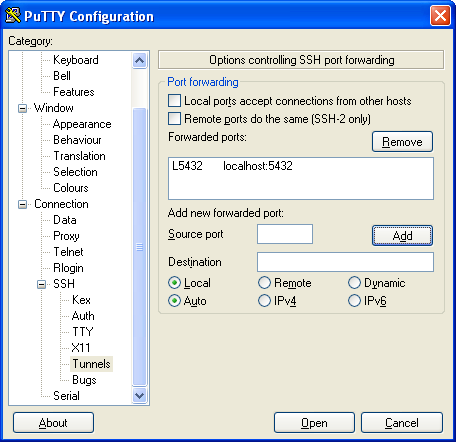
Keep in mind that although we are focusing on PostgreSQL, you can forward other Linux/Unix service traffic such as VNC, FTP etc by adding more entries
- Now go back to the Session section again and click the Save button and then click Open to Launch the Session.
Once you do all of the above you and your Linux/Unix server is enabled with SSH support, you should get a black login console. Login as usual and just keep the console running.
Connecting with PgAdmin III
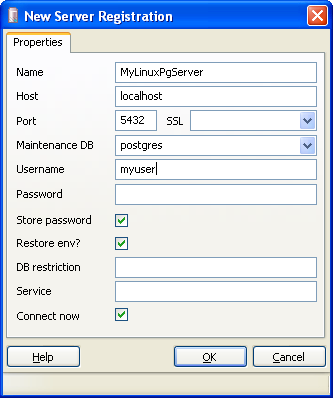
Connecting with PgAdmin III is now simple. The only trick is that instead of using the server's name and port, you specify the destination you chose instead. In the above we had chosen localhost:5432 so we setup a PgAdmin III connection with that as shown below.
